One of those exciting Bugs that hang up your database and leave you stranded. At 6:30 and the workload hang up on the databases, every query local or remote hangs up with no outcome.
Examination of MySQL error log reveled the following cool error messages:
InnoDB: Warning: a long semaphore wait:
--Thread 140178284349184 has waited at dict0dict.c line 747 for 262.00 seconds the semaphore:
Mutex at 0x2c6dc9e8 '&dict_sys->mutex', lock var 1
waiters flag 1
InnoDB: Warning: a long semaphore wait:
--Thread 140178284054272 has waited at dict0dict.c line 747 for 257.00 seconds the semaphore:
Mutex at 0x2c6dc9e8 '&dict_sys->mutex', lock var 1
waiters flag 1
InnoDB: Warning: a long semaphore wait:
--Thread 140178283759360 has waited at dict0dict.c line 747 for 256.00 seconds the semaphore:
Mutex at 0x2c6dc9e8 '&dict_sys->mutex', lock var 1
waiters flag 1
InnoDB: Warning: a long semaphore wait:
--Thread 140178283464448 has waited at buf0buf.c line 1837 for 256.00 seconds the semaphore:
Mutex at 0x3ed5558 '&buf_pool->LRU_list_mutex', lock var 1
waiters flag 1
InnoDB: Warning: a long semaphore wait:
--Thread 140178283169536 has waited at dict0dict.c line 747 for 255.00 seconds the semaphore:
Mutex at 0x2c6dc9e8 '&dict_sys->mutex', lock var 1
waiters flag 1
InnoDB: Warning: a long semaphore wait:
--Thread 140178282874624 has waited at dict0dict.c line 747 for 255.00 seconds the semaphore:
Mutex at 0x2c6dc9e8 '&dict_sys->mutex', lock var 1
waiters flag 1
Turns know bug in MySQL 5.5.24 and 5.5.25 to fix the issue upgrade your databases to MySQL 5.5.27 the same is true for the MariaDB.
This is related to the BUG https://bugs.launchpad.net/percona-server/+bug/1026926
MySQL High Availability
and synchronous replication 3
About Continuent
Tungsten 3
About MySQL MHA 4
Production
Readiness 4
Development
Tools 5
Architecture 5
MHA 5
MHA
deployment diagram 6
MHA
failover diagram 7
Continuent
Tungsten 8
Tungsten
Deployment Diagram 11
Tungsten
Failover Diagram 12
Installation 13
MHA
13
Tungsten 13
Management 13
MHA 13
Tungsten 14
Open Source 14
Conclusion
Background
We selected two MySQL High Availability solutions - MHA from http://code.google.com/p/mysql-master-ha/
and Continuent Tungsten Enterprise from www.continuent.com.
Both suites of applications MHA and Tungsten deliver MySQL high
availability, both of them operate in asynchronous replication mode
and both of them operate in the similar matter by monitoring master
databases and transitioning the replication roles. But they are very
different in the way the monitoring and role transitioning is
actually performed. When selecting MySQL HA solution is is very
important to understand the features and limitations of each
solution, and here it is – the MySQL MHA and Continuent Tungsten
Shootout!
MySQL High Availability and synchronous
replication
The vast majority of MySQL HA solutions are operating in
asynchronous replication mode, where the master (or masters)
databases replicate the data to the slave databases using the log
based replication. That is very different from synchronous data
replication solutions such as DRBD, MySQL NDB cluster, Schooner and
of course Galera. We do not know the actual statistics in the field
but are willing to bet that the 90% (even larger) of all MySQL HA
solutions are based on asynchronous replication, so we picked the
leaders in the field of HA using asynchronous replication.
The reason is that asynchronous replications solutions for MySQL
are so widespread and popular is that they do not require practically
any changes to your existing environment – that means no kernel
modules to install as in case with DRBD and no database storage
changes as in case with MySQL NDB. MySQL synchronous replication
solution are surely awesome but for the purpose of our “shootout”
we will focus on asynchronous replication MySQL HA options.
About Continuent Tungsten
Tungsten Enterprise developed by Continuent www.continuent.com started as CJDBC project and ever since developed into mature MySQL
HA asynchronous replication solution that is fully featured and easy
to deploy and administer. Tungsten suite is a commercial offering,
that means you have to pay license fees to use the product. Tungsten
replicator was released into the open source, but that is replicator
only I.E. the application that replicates the data between the
nodes. In order to enjoy all the of benefits of Tungsten HA
additional components are required such as Tungsten Manager, Tungsten
Monitor and SQL Router. Put together all of those components and you
get Tungsten Enterprise – the full featured suite of MySQL HA and
replication.
Over the years Tungsten has proven itself in the field with
numerous production deployments. Additionally Tungsten has a seasoned
team of developers behind it – so you do not get stranded when you
are in the pinch. Community support is certainly valuable, but when
your databases are mangled into digital tapioca at 3 A.M. it
definitely helps to have a “commercial” team of developers
watching your back.
There is more to Tungsten – since release 1.5 it also supports
cross data center replication. Simply put this allows Tungsten
Cluster in one data center to replicate to another mirror image
Tungsten Cluster in another data center.
That is very cool capability of Tungsten Enterprise since in order
to accomplish that with the “traditional” MySQL replication one
needs to use the combination of DRBD synchronous replication locally
and MySQL replication to replicate the data over to another data
center, all and all mix of synchronous and asynchronous solutions to
get where Tungsten gets you far easier.
This unique capability of Tungsten is possible since the Tungsten
replicator does not rely on MySQL replication to propagate the data
from master to the slaves, instead Tungsten is its own log based
replication for MySQL.
Tungsten is developed in Java with the installation scripts in
Ruby.
About MySQL MHA
MySQL MHA or MySQL High Availability is a collection of Perl
scripts that were developed and maintained by Yoshinori Matsunobu
and can be downloaded from http://code.google.com/p/mysql-master-ha.
Somewhere in the past Yoshinori got frustrated with MySQL MMM
(haven't all of us), but instead of putting up with the frustrations
of MMM and keep adding scrips like most of us did to make MySQL MMM
usable Yoshinori – the savvy dude that he is developed his own
solution and MySQL MHA was born.
Like Tungsten MySQL MHA is a MySQL role transition solution that
has build-in monitoring components that actively monitor the the
master database and perform role relocation in case of master
database outage. MHA guarantees the consistency of the slaves by
locating the the relay log events from the most current slave and
applying them to the other slaves. Just like in the Tungsten
configuration any slave can become a master. Very unlike Tungsten
however MHA is using native MySQL replication for master/slave
monitoring and role transitions.
MySQL MHA is a free and open source tool that can be easily (well
that is assuming you know Perl) customized to fit your specific
needs. Since the release .53 MHA added support for master/master
configurations, that means simply that one of the selected slaves can
be designated a priority fail over destination by using MHA
parameters for example the following parameters designate two masters
for priority fail over or switchover:
[server1]
hostname=atlas
master_binlog_dir=/var/lib/mysql candidate_master=1 check_repl_delay=0
The above parameters candidate_master=1 andcheck_repl_delay=0 instruct MHA to perform the
fail over to the designated master and if you would like to designate
any slave not be failed on or switched on you simply do so by
specifying the following in the configuration file:
[server3]
hostname=zeus no_master=1 no_master=1 instructs
MHA manager not to use server zeus for fail over or switchover.
Production
readiness.
Unlike Tungsten
MHA has seen limited production deployments, it is in use at DeNA
where it manages 150+ masters and slaves. Database administrators
including truly yours tend to be a conservative bunch, by
conservative I do not mean your political orientations here ...simply
stating most of the “seasoned” dba's learned to wait until
someone else wrecks their own production databases prior to jumping
on any new solution, because the last thing you want to do - is to
shut down your production environment and desperately Google the way
out of your tricky situation, all and all it pays to be a
“skeptical” dba. With that we jump to our first shoot in the
shootout - “Production Readiness”
Production Readiness
By production
readiness we mean of course the number of the active production
deployment and the duration of time the particular tool has been in
use. Tungsten clearly wins here, it has been in development far
longer then MHA and has a lot longer list of production deployments.
MySQL MHA
Continuent Tungsten
0
1
Development Tools
By development tools I of course mean the tools and languages that
were used to develop particular solution. Tungsten is developed in
Java, hence is requires Oracle Java run time environment to function,
additionally Tungsten requires Ruby since the installation and
deployment scripts for Tungsten are written in Ruby. MHA solution is
written in Perl – while a great choice, Perl can be quirky to
configure depending on your operating system release. As you'll see
down in the “Installation” section there was some struggle to
configure the environment for MHA to function, cpan of course comes
to the rescue. I am very aware that many of you would like to dispute
the Tungsten scoring an extra point here for choosing Java, and there
could be a an entire books written on the subject, but Perl being the
scripting language and Java “true” development language we
probably can agree on that. By choice of the development environment
Tungsten scored yet another shot:
MySQL MHA
Continuent Tungsten
0
1
Architecture
MHA
MHA works simply by monitoring the MySQL replication roles and
transitioning those roles upon master's failure. In a single MHA
cluster – by cluster of course I mean a single MySQL master
database and one or more MySQL slave databases. MHA does support
master/master configuration, but it is important to grasp that this
capability is simply accomplished by setting the role's priorities.
There can be two MySQL master databases configured but only one
master can receive the application's “write” traffic, the
secondary master (also a slave of primary master) is simply set in
the configuration files as a priority fail over destination.
Master/master configuration means that there can only be one master
within a particular group of replicated databases. Every MHA cluster
configuration requires a dedicated node – MHA manager node, that is
separate from the databases. MHA manager node is monitoring master
and slaves and performs the automated fail over from primary master
to the secondary master by relocating the VIP (virtual ip),
technically you do not have to have a designated secondary master
database, assuming all of your slave databases are the same capacity
MHA manager can automatically perform the relocation of the roles to
the most current (in the replication terms) slave and relocate other
slaves to subscribe to the new master.
MHA manager is essentially a collection of monitoring scripts and
on each MySQL node there is a collection of MHA scripts that parse
MySQL binary and relay logs, locating the position in the relay logs
from which the relay logs should be applied to other slaves. In
summary MHA manager does the monitoring and directs the MHA scripts
installed on MySQL nodes to parse the relay logs and apply on the
slave's thus transitioning the replication roles. MHA solution is
replication aware and works in conjunction with MySQL replication.
For its MySQL replication awareness MHA scores a shot in MySQL
high availability shootout, the solution is very robust and is using
standard MySQL replication:
MySQL MHA
Continuent Tungsten
1
0
MHA solution however falls short of scoring two shots since it
depends on a single MHA manager node to perform the cluster
monitoring. While providing the monitoring for MySQL databases MHA
manager node is itself a SPF – single point of failure or simply
put if your MHA node is down the entire monitoring is down and the
fail over has to be performed manually using the MHA scripts.
MHA deployment
diagram
Here is the simple MHA configuration with two master databases and
two slave databases. The secondary master database is a slave of
primary master database and is set to “read-only” using MySQL
parameter. MHA configuration requires a dedicated node – MHA
manager node that is monitoring the entire configuration (dotted
lines) and performs the automated fail over by relocating replication
roles. One master at a time is receiving the applications writes and
the slaves including the standby master are receiving applications
“reads”. The read/write distribution must be performed by the
application itself, i.e. you need to point your application's writes
to a master database and your application's reads to the slave
databases. Technically your application's writes are actually pointed
to the MySQL master database VIP (virtual ip) that is relocated to
the the standby master database in case of primary master's outage.
Very simple and elegant.
MHA fail over diagram
When the master outage is
detected by MHA manager, MHA will relocate the slave databases to the
standby master database. New master will receive the write traffic
and the slaves will receive the read traffic.
Continuent
Tungsten
Tungsten works conceptually similar to MHA but that is where the
similarities end. Just like MHA Tungsten actively monitors MySQL
instances and transitions the roles in case of primary master
database outage, Tungsten actual monitoring and roles transition is
very different from MHA.
Instead of using standard MySQL replication Tungsten using its own
replication. Tungsten suite consists of several components:
Tungsten replicator
Tungsten monitoring
Tungsten manager
Tungsten SQL router/connector
Tungsten replicator is the component that replicates the data from
MySQL master database to one or more MySQL slave databases. Tungsten
replicator in earlier releases 1.3 and below used to store the
replication data in the MySQL data files, but since the releases 1.5
it stores the replication data in its own log files. In fact in order
to use Tungsten Replicator you must have MySQL replication turned
off. Tungsten replicator has build in consistency checking and
recovery procedures. Just like like using MySQL replication you can
monitor the current position and skip the replication events if
needed, below is the output from “thl
list” command. Tungsten replicator “list” command
will display the event within tungsten replicator each event has its
own SEQ#
Unlike using traditional MySQL replication the interaction with
tungsten replicator is performed using Tungsten replicator tools such
as thl. Tungsten
replicator is storing the replication data in its own logs usually
located in /opt/continuent/thl:
Very unique solution for MySQL replication indeed, but it gets
even better Tungsten replicator is released in open source and is
capable to replicate data from other sources into MySQL for example
MongoDB.
For its unique and recently open source solution and in addition
the capability to replicate the database from other sources into
MySQL Tungsten Replicator is scoring a shot in our shootout:
MySQL MHA
Continuent Tungsten
0
1
But there is a lot more to Tungsten
suite then just the replicator. Tungsten manager is actively
monitoring the nodes using group communication protocol and once the
master database outage is detected tungsten manager will perform fail
over to the next available node in the cluster. What is unique in
Tungsten solution is that there is no need for a dedicated node to
perform the monitoring and fail over In fact the fail over or
switchover can be performed from any node that is member of Tungsten
cluster. Tungsten has effectively eliminated the SPF (single point of
failure) that is MHA needs in order to function.
Here is the view on the Tungsten
console or cctrl:
The interesting aspect of the Tungsten
implementation is that this management console “cctrl” can be
accessed from any node member of the Tungsten cluster, master or a
slave or simply put you can perform the switchover by logging to the
slave. Very unique and useful feature, no need to go to a dedicated
“management” node.
Tungsten SQL Router/Connector.
Tungsten SQL Router/Connector – is a
unique component of Tungsten architecture and deserves special
attention. Essentially Tungsten SQL router is JDBC wrapper, you
establish your database connections to Tungsten SQL Router and
Tungsten SQL router is in turn is connected to MySQL databases. Why
bother you ask? Tungsten SQL router being a member of Tungsten suite
is aware which database is a master and which are the slaves.
Tungsten SQL router automatically sends write requests to the master
database and read requests to the slave databases, thus eliminating
the need to hard code your application for read/write splitting, just
configure the Tungsten SQL router, get connected and it will take
care of the rest. In addition when your primary database fails
Tungsten SQL router will re route all the connection to the next in
line master and slaves. Very powerful feature indeed. And with that
Tungsten scores yet another shot in our “shootout”:
MySQL MHA
Continuent Tungsten
0
1
Tungsten
Deployment Diagram
Here is depicted Tungsten cluster with master database and three
slave databases. Application is connected to Tungsten connectors on
each box. Tungsten connector automatically does read/write
distribution based on databases roles.
Tungsten Failover Diagram
In this diagram MySQL master database failed and Tungsten manager
promoted the next slave to become a master database. Tungsten
connector re routed the database connections to to the new master and
slaves and repositioned Tungsten replicator.
MHA manager node is the dedicated node that manages all of the
nodes members of MHA cluster. As you probably noticed on MHA node
both manager and the node components are installed.
The actual installation using rpms was moderately painful –
since the the MHA manager components rely on a particular Perl
distribution, so instead of suffering though and using the documented
installation path I used cpan to install Perl dependencies. After
that the deployment was a breeze. You still have to manually craft
the MHA cluster configuration files.
Tungsten
Tungsten installation is simple but does require Ruby and Oracle
Java install prior to the installation. After that download Tungsten
from www.continuent.com. You
will only need one archive tungsten-enterprise-1.5.0-415.tar.gz to
install.
Tungsten just like MHA requires ssh keys configured in all the
nodes, prior to the installation. Once configured place Tungsten
archive tungsten-enterprise-1.5.0-415.tar.gz on your master box and
run the installation script . Tungsten install process will push all
the components to the nodes members of the Tungsten Cluster and
configure the entire cluster for you.
Frankly I missed the simplicity of the old ./configure command
that was used in older 1.3 releases. New installation does not give
you much control and more work is needs to be done to adapt it to the
Chef or Puppet deployments.
MHA provides a collection of tools (perl scripts) to manage your
MHA cluster. The tools are located on the MHA management node in
/usr/bin directory:
Version:1.0
StartHTML:0000000167
EndHTML:0000004664
StartFragment:0000000969
EndFragment:0000004648
Using MHA tools is fairly simple once you configured the MHA
manager configuration file. MHA tool set allows you to monitor the
MHA manager and the replication, you can also use MHA tools to
perform a scheduled switchover i.e. switch from your primary master
database to the standby master database or a slave.
The interesting aspect when working with MHA is that after
initiating the switchover from primary master to the secondary you
must then re establish the replication from the primary master to the
secondary and restart MHA manager. That is done automatically when
using Tungsten.
Tungsten
Tungsten suite provides a full featured character based console
for Tungsten cluster management – cctrl. Using cctrl you can easily
perform a scheduled switchover or fail over Tungsten will
automatically reposition the replication roles and keep all cluster
members in sync. In addition Tungsten console provides tools to
recover the replication slaves if needed.
Tungsten management console is a well designed and production
tested tool – and here Tungsten earns yet another shot:
MySQL MHA
Continuent Tungsten
0
1
Open Source
MHA is fully open source – feel free to use and customize.
Tungsten on the other hand is a commercial software. Continuent
did release the Tungsten replicator into the open source, but that is
replicator component only.
MHA scores a shot on the open source release:
MySQL MHA
Continuent Tungsten
1
0
Conclusion
Here are the results of our “shootout”:
MySQL MHA
Continuent Tungsten
2
5
Continuent Tungsten being a more
“mature” and established product clearly wins by 3 points.
Whichever one you choose those two are the leading options for
asynchronous MySQL High Availability.
We expect MySQL MHA to grow and be used
in many MySQL HA deployments. Its open source option will surely help
MHA to proliferate in MySQL sphere.
My title
page contents
closely resembling the original concerning its shape and appearance". Did you notice something in the definition? See the replica is actually a "close resemblance" and not an mirror image. When it comes to MySQL replication the above definition of the replica is very true - your replicated slaves will "closely resemble" your master database and will not be an exact copy.
MySQL replication is very widely used for MySQL HA (High Availability) and the general presumption and expectation is that the master/master (or master/slave) produce exact copy of the master. False expectation to say the least, well to the defense of MySQL replication I might say that it was never designed for HA, it was merely adapted to be used for MySQL high availability. To be fair this is true not only MySQL replication but for any other asynchronous replication out there. The database replication was designed for "data propagation" i.e. moving the data from one database to another and in turn for adapted for proving high availability.
We are all used to "skip" troublesome replicated entries - cancelled transaction on the master, corrupted relay log etc:
mysql>; SLAVE STOP;
mysql>; SET GLOBAL SQL_SLAVE_SKIP_COUNTER=1;
mysql>; SLAVE START;
But the issues that cause most trouble are the silent ones. Those ones you do not see until its too late and you might need a slave rebuild once discovered.
Mixing The Engines, Transactions and Statement Based Replication
Statement Based Replication.
The idea behind is very simple - record all statement in binary log, retrieve the log from the slave in the form of relay log and replay the SQL statements. The problems are located at the cove of this brilliant simplicity.
Hence the statement based replication simply replays the binary log on the slave it does not really care if replay does not delete or update the exact rows that were deleted or updated on the master.
How? Take the LIMIT clause - this clause unless enforced by ORDER BY very frequently will produce different order on the master and slave databases. Most importantly this is silent, you'll never notice it until too late that master and slave drifted out of control.
Simply put - when using statement based replication you letting the database engine (on master and slave) to make the determination which rows will be updated or deleted. To avoid this make the determination yourself i.e. tell the database engine the exact rows you want updated or deleted.
Mixing the Engines.
When is comes to mixing the engines or transactional and non-transactional engines the resulting "replication" could be really twisted. SQL statements that are deemed by database engine as "non-transactional" are written to the binary log immediately and SQL statements that are deemed "transactional" are written to the binary log only when they are committed. The result is the inevitably the statements can be added and replayed in incorrect order depending on the storage engines.
Mixing the engined is actually very widely used. For example that are a lot of "reporting" databases slaving of NDB and INNODB for reporting purposes (merge tables feature is used) inevitable those reporting databases frequently produce "strange" results.
Row Based Replication
Row based replication records and propagates to the slaves the changes to the actual rows, thus avoiding the possibility of the individual database engine (one on the master and one on the slave) to make a determination which rows are to be deleted or updated. Yes there is a whole list of drawbacks to row based replication - increased log size, longer database restore times etc...
In conclusion - I have attempted to highlight the issues that are inherently present when using MySQL replication for HA or data propagation. The list of the actual issues that can be encountered is far larger for the single post.
When designing MySQL databases for HA (or reporting) take into consideration replication formats (STATEMENT, ROW), stored procedures and functions, databases engines (TRANSACTIONAL, NON TRANSACTIONAL) and most importantly review the applications SQL code to assure that the selected strategy will produce the desired results.
For DBA's this simply boils down to - review all SQL statements that you are deploying to the databases - this will save you sleepless nights after you end up with a copy "closely resembling the original".
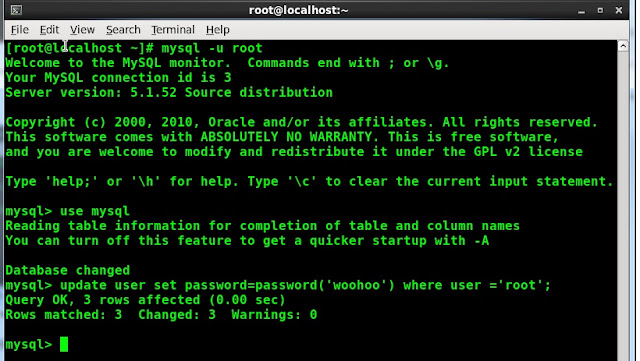
In my previous posting I explained how to reset MySQL root password using" --init-file" MySQL start up parameter. Yet there is another option using "--skip-grant-tables" MySQL parameter.
Here is how to do it:
1. Shutdown MySQL using /etc/init.d/mysqld stop
2. Star MySQL using "--skip-grant-tables" parameter
/etc/init.d/mysqld-safe --skip-grant-tables
MySQL is now running in back round since we used (&) option
3. Now we can reset any password since MySQL is not validating permissions:
Login as root (you will not be prompted for the passoword) and reset MySQL root passwod:
mysql> update user set Password=PASSWORD('whoohoo') WHERE User='root';
Pretty cool huh, now you can restart MySQL as usual using "/etc/init.d/mysqld restart" and enjoy the changes.
How to reset MySQL root password. Did you know it is very easy to reset MySQL root password or any password for that matter.
Option 1. Use MySQL --init-file parameter MySQL parameter
Why would someone what to do it - for very obvious reasons, someone may forget the password, dba on vacation and hundreds of other possibilities.This blog post will walk you though resetting/changing MySQL root or any other password.
In MySQL realm once you have read and execute permissions to use MySQL executables particularly mysqld and mysqld_safe you already have the capability to reset any password. So no matter how intricate are your MySQL password anyone with execute privileges can reset the passwords.
Here is how to do it:
Create reset password file. This file will be executed on MySQL daemon start up and will update passwords for the desired user in our case we are resetting MySQL root password:
UPDATE mysql.user SET Password=PASSWORD('WooHoo') WHERE User='root';
FLUSH PRIVILEGES;
As you can see from the above we created a text file that simply updates USER table IN
MYSQL database by setting the password to 'WooHoo'. You can name the file whatever you would like.
Shut down MySQL daemon:
Execute /etc/init.d/mysql stop
Start MySQL daemon and use your reset password file you create above to reset the root password:
Ideal MySQL Database Machine.
I was asked recently to envision an ideal database box - in terms of configuration. Of course the more CPU and memory is better and SSD (Solid State Drives) would not hurt either. But lets focus on the basics of the configuration - OS, raid, CPU type File systems etc...
CPU. Intel hands down, having used nearly every processor out there (Sparc, Power, Alpha ...) I have settled on Intel. Despite all the advanced in the AMD research Intel still rains supreme in the databases. Now to the number of cores - as many as possible.
Raid. Of course hardware raid. I would strongly vote for Raid 10 (mirror with striping) and most importantly have two controllers - one for the database data files one for the database log files. Be sure to configure LVM (Logical Volume Manager) to enjoy LVM snapshot capability.
Network. Minimum two network cards bonded into a single interface.Most of the databases today have some sort of HA (replication, clustering) so bonding is a must. Not to mention you get better network performance in the end.
Operating System. Unless you have spend past ten years under the rock - you know that Linux is the choice when it comes to the databases - CenOs in my particular case. Install minimum kernel to support the database operation.
Filesystem. XFS for the database data files and database log files. If using ext3 (ext4) be sure to use noatime and data=writeback for better performance.
MySQL Installation. I have migrated to MariaDB and still prefer the binary (tarball) install vs. rpm. I usually install MySQL in /opt/mysql/MySQL_version_number i.e. /opt/mysql/MySQL_5.1.0. This allows me to maintain several versions during an upgrade process and revert back to the original is case I have issues.
Are you Bonding? If not you are missing out on some great features.
It would be pretty hard now days to find a server with a single network card, even some of the laptops have two network interfaces.
Most of the Linux distributions have build in capability for so-called "Channel Bonding". Channel bonding of "Bonded Interfaces" allow you to logically bond (or merge) two or more physical network cards into one logical interface.
Why would someone do that? Several reasons - HA (high availability) and improved performance. If you are using one network card and run your MySQL replication (or clustering) over it and that card dies you will loose your HA, as a mater of fact if you are not bonding, the network card is a single point failure in your HA deployment!
Bonding on the other hand prevents outages and as in case of clustering false failovers in case of network card failures. In many MYSQL HA solution such as DRBD and NDB you must use some type of bonding.
The real of beauty of bonding is that its so simple to configure. Here is how to do it:
cd /etc/sysconfig/network-scripts/ "This is your network config ditectory"
Create new file for your new bonded network interface - will name it bond0
Now we have to make sure that the bonding kernel module loads when we bring up the interface:
# vi /etc/modprobe.conf
options bond0 mode=balance-alb miimon=100
Now load the bonding module:
#modprobe bonding
Restart your network for the changes to take effect:
#service network restart
Simple as that.
Be sure to test your new bonded interface by shutting down on of the cards eth0 or
eth1 and making sure your MySQL replication is working.
We can view the /proc/net/bonding/bond0 to monitor the state of bonded interface;
#cat /proc/net/bonding/bond0
Bonding Mode: load balancing (round-robin)
MII Status: up
MII Polling Interval (ms): 100
Up Delay (ms): 200
Down Delay (ms): 200
Slave Interface: eth0
MII Status: up
Link Failure Count: 0
Permanent HW addr: 00:0c:29:c6:be:59
Slave Interface: eth1
MII Status: up
Link Failure Count: 0
Permanent HW addr: 00:0c:29:c6:be:63
MariaDB or MySQL ext3 ext4 journaling options for faster databases.
In my previous posting http://alexalexander.blogspot.com/2011/12/mariadb-and-mysql-performance-boost.html I was suggesting to use "noatime" to improve your databases performance. Now we can go a step further to make things even faster - ext 3 or ext4 filesystem journaling options:
Most of us are aware that modern filesystems (ext3, ext4, xfs, reiser etc...) use journaling. Journaling in concept is very similar to databases write ahead logging WAL it helps to avoid data corruption on the filesystem when the system is abruptly shutdown. On system's comeback the filesystem will replay the journal and correct the data on the filesystem. Awesome concept, but were you aware that there are several options to journaling and depending on the options selected it could improve your database performance?
Linux ext3, ext4 journaling options from fastest to slowest:
data=writeback
When your ext3 filesystem is mounted with data=writeback option ext3(ext4) records onlythe metadata. BTW this is default journaling mode for xfs and Reiserfs filesystems.
data=ordered
data=ordered is recording metadata and grouping metadata related to the data changes. By doing so it provides more of journaling protection vs. data=writeback at the expense of reduced performance when compared to data=writeback.
data=journal - the is the ext3 default mode
data=journal is recording metadata and all data and is the slowest method at the benefit of full protection against data corruption.
data=writeback will deliver the fastest results for the database mount points. The databases have build in data protection suchas - WAL.
How to enjoy the benefits of data=writeback? Very simple. Dismount your filesystem using umount - modify the
mounting option by adding data=writeback and mount the filesystem back. Of course be sure
to shut down your MariaDB prior to the unmout/mount. Once completed
your /etc/fstab will look like this:
MariaDB and MySQL performance boost using noatime. Take a peek at your filesystem mount file on your Linux Box /etc/fstab
/dev/VolGroup01/LogVol01 /data ext3 defaults 0 0
In many cases just like the above you'll see that MySQL data location is mounted with "defaults" options - in our case MySQL data files are located in /data partition.
What does it mean? It means that you are taking a performance hit every time the file is accessed (read or write) on your file system. There is a record created i.e. physically written to the file system, that is besides MySQL access.
The issue is that if you do not explicitly specify "noatime" mount option for your ext3 file system the default "atime" will be used. This option is constantly writing to the disk bogging down your io performance. Unless you have a specific need for "atime" you are wasting io resources especially if you are using database system.
Now to the "noatime", "noatime" writes to the disk every time a particular file was modified, i.e. unlike "atime" the file must be physically modifies in order for "noatime" to generate a physical white to the disk, thus dramatically reducing your io and boosting performance.
So how do you take advantage of this performance boosting option - very simple. Dismount your filesystem using umount - umount /data, modify the mounting option by adding noatime and mount the filesystem back. By far the easiest performance gain in one line modification. Of course be sure to shut down your MariaDB prior to the unmout/mount. Once completed your /etc/fstab will look like this:
LVM - or simply Logical Volume Manager, Linux LVM is the implementation of Logical Volume Manager for the Linix kernel. Most of the Linux distributions include LVM. Besides obvious benefits of using Logical Volume Manager there is also a great feature - LVM snapshot capability that is included in Linux LVM
LVM snapshot is an awesome tool that is included with your Linux distribution at no charge to you! LVM snapshot allows you to create a new block device that is the exact copy of the logical volume frozen in time.
Why this is such a great capability? Say you have a 500GB database and need to create a replicated slave or take a database backup. In order to do that you have to resort to one of the following:
1. Stop the database (or flush tables with read lock) and copy the files - that could take several hours.
2. Use INNODB backup tools - still will take quite some time and that does not copy your MYISAM tables
3. Use MySQL dump - not even practical for 500 GB database could take days!
Enter the LVM snapshot greatness - very simple, fast and least downtime way to create your MySQL backup and recovery strategy. Most importantly unlike dedicated storage engine backup solutions (IBBACKUP etc...) LVM snapshot will work with your MYISAM tables also.
Here's how to implement it:
First and foremost you must have LVM enabled, assuming that you have you can use LVM commands to explore your logical volumes. LVM commands are located in /sbin/ directory.
Start using LVM
[root@db22 /]# ./sbin/lvm
lvm>
View your logical volumes:
[root@db22 /]# ./sbin/lvm
lvm> lvdisplay
--- Logical volume ---
LV Name /dev/VolGroup00/LogVol00
VG Name VolGroup00
LV UUID u8PhLr-6dfg-WcmL-qzCr-4E6a-2wYB-IlNsrh
LV Write Access read/write
LV Status available
# open 1
LV Size 31.66 GB
Current LE 1013
Segments 1
Allocation inherit
Read ahead sectors 0
Block device 253:0
--- Logical volume ---
LV Name /dev/VolGroup00/LogVol01
VG Name VolGroup00
LV UUID gA8rvW-QwxV-GbLB-KADy-Ank9-9vJx-D3VKz0
LV Write Access read/write
LV Status available
# open 1
LV Size 1.94 GB
Current LE 62
Segments 1
Allocation inherit
Read ahead sectors 0
Block device 253:1
--- Logical volume ---
LV Name /dev/VolGroup01/LogVol01
VG Name VolGroup01
LV UUID KLND46-bfYW-MpaZ-hr2y-6nF4-L1yo-zeT4Zr
LV Write Access read/write
LV Status available
# open 1
LV Size 772.91 GB
Current LE 197866
Segments 2
Allocation inherit
Read ahead sectors 0
Block device 253:2
lvm>
Now you can figure out which logical volume is hosting your database data by viewing /etc/fstab file - your Linux partition mount file:
Based on the output of /etc/fstab we can determine that our MySQL data is located in /data mount point that in turn is on /dev/VolGroup01/LogVol01 logical volume. Very easy.
Now to the creating the actual snapshot of the logical volume
/dev/VolGroup01/LogVol01:
Since the data we are taking snapshot of is dynamic (that is true of all database systems), we need to place MySQL in read-only mode for the duration of time it take to create a snapshot in many cases less then a minute:
mysql> flush tables with read lock;
You must maintain the lock while the LVM snapshot is being taken. If you exit your mysql session the tables will be unlocked. There several ways to assure that the tables remain locked:
Stay in your mysql session open another terminal and run snapshot
Place mysql> session in the backround using "CTRL+z" (to get back to it use "fg" command"
Run mysql> session in screen
That will stop the updates to the MySQL tables so we can generate a "consistent" view of the data using LVM snapshot.
Since we know the name of the volume we are planning to use /dev/VolGroup01/LogVol01 we will use the LVM and create a snapshot as follows:
Once snapshot is created be sure to unlock MySQL tables:
mysql> unlock tables;
Where is "snap" the name of our snapshot volume and "/dev/VolGroup01/LogVol01" is the name of the volume where MySQL data is located, "L2000M" is the size of the snapshot in megabytes.
Once the snapshot is create we can view it using lvm tool "lvdisplay":
--- Logical volume ---
LV Name /dev/VolGroup01/snap
VG Name VolGroup01
LV UUID ze9d5L-LQWa-bsxY-ubI2-eyYy-t3Uw-v5EbXI
LV Write Access read/write
LV snapshot status active destination for /dev/VolGroup01/LogVol01
LV Status available
# open 0
LV Size 772.91 GB
Current LE 197866
Once the snapshot volume is created it must be mounted to copy the data from it, in order to do that new snapshot volume must be mounted:
Oracle Releases "MySQL: A guide to High Availability Solutions". There are several commonly accepted requirements in order to be called a "Guide" such as be informative and attempt to include all of the solutions available.
Oracle's so-called Guide missed all of the above it failed to include:
1. Continuent Tungsten HA 2. Schooner Replication 3. Red Hat Cluster 4. VCS 5. Percona MMM 6. DRBD
But the so-called Guide did not stop there, "The Guide" also miserably fails to even attempt to be informative. It briefly describes solutions already widely known such as replications and MySQL Cluster - Wooo Hoo we have known about those some some time now ...ahhh nearly a decade.
Instead the guide goes into page filling "blah...blah" about causes of failures and meaningless charts. No mention about the best practices or even practical approach to HA.
In conclusion "The Guide" is not a Guide at all but rather a weak sales brochure.
So Microsoft goes out and buys Skype - probably not a very wise move for the company that currently focused primarily on suing various companies over "patent infringements". Ok all the patents lawsuits aside they have themselves Skype that in turn runs on PostgreSQL and consequently on some flavor of Linux.
Hmmm a tough one - "To migrate or Not To Migrate?!" - that is the question...
By "migrate" I mean from trusted and proved Linux/Postgres combination to Windows (that btw can barely run my laptop and that is after twenty years into the development!) and SQLServer.
The answer if you have any common sense is a very simple and short - NO. But when last time have you seen any common sense come out of Redmond? This is the same company that requires users to push a "Start" button in order to shutdown the operating system.
RMAN can be used either with or without a recovery catalog. A recovery catalog is a schema stored in a database that tracks backups and stores scripts for use in RMAN backup and recovery situations. Generally, an experienced DBA would suggest that the Enterprise Manager instance schema and RMAN catalog schema be placed in the same utility database on a server separate from the main servers. The RMAN schema generally only requires 15 megabyte per year per database backed up.
The RMAN schema owner is created in the RMAN database using the following steps:
1. Start SQL*Plus and connect as a user with administrator privileges to the database containing the recovery catalog. For example, enter:
CONNECT SYS/oracle@catdb AS SYSDBA
2. Create a user and schema for the recovery catalog. For example, enter:
CREATE USER rman IDENTIFIED BY cat TEMPORARY TABLESPACE temp DEFAULT TABLESPACE tools QUOTA UNLIMITED ON tools;
3. Grant the recovery_catalog_owner role to the user. This role provides all of the privileges required to maintain and query the recovery catalog:
SQL> GRANT RECOVERY_CATALOG_OWNER TO rman;
Once the owner user is created, the RMAN recovery catalog schema can be added:
1. Connect to the database that contains the catalog owner. For example, using the RMAN user from the above example, enter the following from the operating system command line. The use of the CATALOG keyword tells Oracle this database contains the repository:
% rman CATALOG rman/cat@catdb
2. It is also possible to connect from the RMAN utility prompt:
% rman
RMAN> CONNECT CATALOG rman/cat@catdb
3. Now, the CREATE CATALOG command can be run to create the catalog. The creation of the catalog may take several minutes. If the catalog tablespace is this user's default tablespace, the command would look like the following:
CREATE CATALOG;
While the RMAN catalog can be created and used from either a 9i or 10g database, the Enterprise Manager Grid Control database must be a 9i database. This is true at least for release 1, although this may change with future releases.
Each database that the catalog will track must be registered.
Registering a Database with RMAN
The following process can be used to register a database with RMAN:
1. Make sure the recovery catalog database is open.
2. Connect RMAN to both the target database and recovery catalog database. For example, with a catalog database of RMANDB and user RMAN, owner of the catalog schema, and the target database, AULT1, which is the database to be backed up, database user SYS would issue:
If the instances use archive logs, RAC requires that a channel connection be specified for each instance that will resolve to only one instance. For example, using the AULT1 and AULT2 instances from the previous example:
CONFIGURE DEFAULT DEVICE TYPE TO sbt; CONFIGURE DEVICE TYPE TO sbt PARALLELISM 2; CONFIGURE CHANNEL 1 DEVICE TYPE sbt CONNECT = 'SYS/kr87m@ault1'; CONFIGURE CHANNEL 2 DEVICE TYPE sbt CONNECT = 'SYS/kr87m@ault2';
This configuration only has to be specified once for a RAC environment. It should be changed only if nodes are added or removed from the RAC configuration. For this reason, it is known as a persistent configuration, and it need never be changed for the life of the RAC system. This configuration requires that each of the specified nodes be open, the database is operational, or closed, the database shutdown. If one specified instance is not in the same state as the others, the backup will fail.
RMAN is also aware of the node affinity of the various database files. The node with the greatest access will be used to backup those datafiles that the instance has greatest affinity for. Node affinity can, however, be overridden with manual commands, as follows:
The nodes chosen to backup an Oracle RAC cluster must have the ability to see all of the files that require backup. For example:
BACKUP DATABASE PLUS ARCHIVELOG;
The specified nodes must have access to all archive logs generated by all instances. This could entail some special considerations when configuring the Oracle RAC environment.
The essential steps for using RMAN in Oracle RAC are:
* Configure the snapshot control file location.
* Configure the control file autobackup feature.
* Configure the archiving scheme.
* Change the archivemode of the database, although this is optional.
* Monitor the archiver process.
The following section will show how the snapshot control file location is configured.
Clone an Oracle database using RMAN duplicate (same server) tnsManager - Distribute tnsnames the easy way and for free!
This procedure will clone a database onto the same server using RMAN duplicate.
* 1. Backup the source database. To use RMAN duplicate an RMAN backup of the source database is required. If there is already one available, skip to step 2. If not, here is a quick example of how to produce an RMAN backup. This example assumes that there is no recovery catalog available:
rman target sys@ nocatalog
backup database plus archivelog format '/u01/ora_backup/rman/%d_%u_%s';
This will backup the database and archive logs. The format string defines the location of the backup files. Alter it to a suitable location.
* 2. Produce a pfile for the new database This step assumes that the source database is using a spfile. If that is not the case, simply make a copy the existing pfile.
Connect to the source database as sysdba and run the following:
create pfile='init.ora' from spfile;
This will create a new pfile in the $ORACLE_HOME/dbs directory.
The new pfile will need to be edited immediately. If the cloned database is to have a different name to the source, this will need to be changed, as will any paths. Review the contents of the file and make alterations as necessary.
Because in this example the cloned database will reside on the same machine as the source, Oracle must be told how convert the filenames during the RMAN duplicate operation. This is achieved by adding the following lines to the newly created pfile:
* 6. Duplicate the database From sqlplus, start the instance up in nomount mode:
startup nomount
Exit sqlplus, start RMAN and duplicate the database. As in step 1, it is assumed that no recovery catalog is available. If one is available, simply amend the RMAN command to include it.
rman target sys@ nocatalog auxiliary /
duplicate target database to ;
This will restore the database and apply some archive logs. It can appear to hang at the end sometimes. Just give it time - I think it is because RMAN does a 'shutdown normal'.
If you see the following error, it is probably due to the file_name_convert settings being wrong. Return to step 2 and double check the settings.
RMAN-05001: auxiliary filename '%s' conflicts with a file used by the target database
Once the duplicate has finished RMAN will display a message similar to this:
database opened Finished Duplicate Db at 26-FEB-05
RMAN>
Exit RMAN.
* 7. Create an spfile From sqlplus:
create spfile from pfile;
shutdown immediate startup
Now that the clone is built, we no longer need the file_name_convert settings:
alter system reset db_file_name_convert scope=spfile sid='*' /
alter system reset log_file_name_convert scope=spfile sid='*' /
* 8. Optionally take the clone database out of archive log mode RMAN will leave the cloned database in archive log mode. If archive log mode isn't required, run the following commands from sqlplus:
shutdown immediate startup mount alter database noarchivelog; alter database open;
* 9. Configure TNS Add entries for new database in the listener.ora and tnsnames.ora as necessary.
How to bring Oracle Database Back from the Dead or how to open an Oracle database with missing (or deleted, or lost) archive logs.
Here is the "typical" scenario you need to open/recover oracle database but you do not have the archive log files - that pretty much renders your Oracle database useless except you do know that that the data is still there and there MUST be a way to open the database without the archive logs and “reset” logfiles…
Here is how to open Oracle Database without archive logs:
1. Shutdown your database. 2. Set the following parameter in your init.ora files (you might need to create pfile from spfile)
_allow_resetlogs_corruption=true 3. Mount your database and issues “alter database open resetlogs” 4. The database will attempt to open but will crash. 5. Edit your init.ora file and and perform the following:
Remove _allow_resetlogs_corruption=true entry Add undo_management=manual 6. Mount your database 7. Recover database using “recover database command” 8. Open your database – “miracle” your database will open. “alter database open” do not user “alter database open resetlogs”
BUT (It’s a big BUT) the database is not ready yet
Your UNDO tablespace is still in manual mode and the original UNDO tablespace is still corrupted.
Here is how to fix that:
1. Create new undo tablespace i.e UNDOTBS2 2. Set UNDOTBS2 as default undo tablespace 3. Remove undo_management=manual from init.ora 4. Bounce your database
Follow below step to drop your “old” tablespace:
1 – Identify the bad segment -
select segment_name, status from dba_rollback_segs where tablespace_name='undotbs_corrupt' and status = ‘NEEDS RECOVERY’;
SEGMENT_NAME STATUS ------------------------------ ---------------- _SYSSMU22$ NEEDS RECOVERY
2. Bounce the instance with the hidden parameter “_offline_rollback_segments”, specifying the bad segment name:
_OFFLINE_ROLLBACK_SEGMENTS=_SYSSMU22$
3. Bounce database, nuke the corrupt segment and tablespace: SQL> drop rollback segment "_SYSSMU22$"; Rollback segment dropped.
SQL > drop tablespace undotbs including contents and datafiles; Tablespace dropped. Now you are done …
FNDCPASS is an EBS tool to change passwords of database schema's within the Oracle EBS. For example, you can change the APPS password using FNDCPASS, but also any other schema in the EBS database. FNDCPASS can also be used to change the password of an application user (like sysadmin).
To change the APPS password use... FNDCPASS apps/*** 0 Y system/***** SYSTEM APPLSYS [new_password]
To change any other schema... FNDCPASS apps/**** 0 Y system/***** ORACLE GL [new_password]
To change the password of a application user FNDCPASS apps/*** 0 Y system/****** USER SYSADMIN [new_password]
When changing the password of all schemas in the database, you have a lot off FNDCPASS to do...there are almost 200 schemas in the EBS database that need to be changed. Default the password is schema name, so gl/gl and ap/ap...
When installing patch 4676589 (11i.ATG_PF.H Rollup 4) a new feature is added to FNDCPASS. Now you can use the ALLORACLE functionality to change all the schema passwords in one FNDCPASS.
Here is what I did to use the new FNDCPASS feature...
1. install AD: Patch 11i.AD.I.4 (patch 4712852) 2. install patch 5452096 Purging timing information for prior sessions. sqlplus -s APPS/***** @/appl/prodappl/ad/11.5.0/admin/sql/adtpurge.sql 10 1000 Spawned Process 17504 Done purging timing information for prior sessions. AutoPatch is complete. AutoPatch may have written informational messages to the file/appl/prodappl/admin/prod/log/u5452096.lgi Errors and warnings are listed in the log file/appl/prodappl/admin/prod/log/u5452096.log and in other log files in the same directory. 3. run the Technology Stack Validation Utility [oracle@ebs2 bin]$ ./txkprepatchcheck.pl -script=ValidateRollup -outfile=$APPLTMP/txkValidateRollup.html -appspass=apps *** ALL THE FOLLOWING FILES ARE REQUIRED FOR RESOLVING RUNTIME ERRORS ***STDOUT /appl/prodcomn/rgf/prod_ebs2/TXK/txkValidateRollup_Mon_Jan_8_stdout.log Reportfile /appl/prodcomn/temp/txkValidateRollup.html generated successfully. 4. run autoconfig 5. apply patch 4676589 (11i.ATG_PF.H Rollup 4, Applications Technology Family) 6. After the install 7. apply patch 3865683 (AD: Release 11.5.10 Products Name Patch) 8. apply patch 4583125 (Oracle XML Parser for Java) see note 271148.1
Verify if the upgrade has been successful.. cd $JAVA_TOP [oracle@ebs2 java]$ unzip -l appsborg.zip grep 9.0.4 0 04-19-03 02:10 .xdkjava_version_9.0.4.0.0_production [oracle@ebs2 java]$ if there is an xdkjava_version_9.0.4.0.0_production entry, then XML parser is installed. 9. run autoconfig 10. disable maintenance mode (via adadmin) Change Maintenance Mode ---------------------------------------- Maintenance Mode is currently: [Enabled]. Maintenance mode should normally be enabled when patchingOracle Applications and disabled when users are logged onto the system. See the Oracle Applications MaintenanceUtilities manual for more information about maintenance mode. Please select an option: 1. Enable Maintenance Mode 2. Disable Maintenance Mode 3. Return to Main Menu
Enter your choice [3] : 2 sqlplus -s &un_apps/***** @/appl/prodappl/ad/11.5.0/patch/115/sql/adsetmmd.sql DISABLE Successfully disabled Maintenance Mode.
Now try the new FNDCPASS function..
[oracle@ebs2 prod_ebs2]$ FNDCPASS apps/apps 0 Y system/manager ALLORACLE WELCOME Log filename : L2726002.log Report filename : O2726002.out [oracle@ebs2 prod_ebs2]$ [oracle@ebs2 prod_ebs2]$ sqlplus apps/apps SQL*Plus: Release 8.0.6.0.0 - Production on Mon Jan 15 08:50:39 2007 (c) Copyright 1999 Oracle Corporation. All rights reserved. Connected to: Oracle Database 10g Enterprise Edition Release 10.2.0.2.0 - Production With the Partitioning, OLAP and Data Mining options SQL> conn gl/welcome Connected. SQL> conn ap/welcome Connected. SQL>